Stucco FAQ according to Portland Cement Association
Stucco, the common term for portland cement plaster, is a popular exterior finish for buildings. It provides an economical hard surface that is rot, rust, and fire resistant, which can be colored and finished in a wide range of textures to adorn any architectural style.
Stucco Guide Table of Contents
- Are plaster, stucco, and EIFS the same?
- What are appropriate sheathing materials for plaster construction?
- What are the correct proportions for stucco? Is there a difference between the coats?
- What type of cements can be used to make stucco?
- Where can I buy stucco?
- Can stucco (portland cement plaster) be applied directly over painted brick?
- Does stucco require curing, and if it does, how is this best accomplished?
- Does the type of joint in plaster affect its spacing or location?
- How is stucco applied over insulating concrete forms (ICFs)?
- Is it necessary to use a bonding agent with stucco?
- WPlaster is placed in two or three layers, or “coats.” Are there guidelines or restrictions on placing each successive coat?
- What is the correct thickness of stucco?
- What is the installed weight of portland cement plaster?
- What is the proper spacing for contraction/expansion joints in portland cement plaster/stucco applications?
- Why use building paper?
- How long does stucco last on a building?
- Now that we are seeing cold weather, are there any restrictions on plastering at lower temperatures? Can installation in too low a temperature be problematic for any aspect of stucco work, say, getting a durable finish?
- What kind of fire rating does plaster provide?
Materials FAQ
While there are several parts of the North America where stucco always has a strong presence, there appears to be a general renewed interest in portland cement plaster for building finishes everywhere. We are often asked if stucco and plaster are the same thing, and if plaster and exterior insulation finishing systems (EIFS) are the same thing.
Are plaster, stucco, and EIFS the same?
The answer requires a thorough explanation. Plaster is the general term for material that is applied to a wall surface in a thin layer. portland cement-based plaster is such a material that uses portland cement as the binder. It is sometimes called “traditional stucco.” Stucco is a somewhat colloquial term for portland cement plaster, and some people consider it to refer to an exterior, not interior, finish. Exterior insulation and finish system is sometimes (incorrectly) called “synthetic” stucco. To complicate matters, “plastering” is the verb that describes the action of applying any of these various materials to a wall surface.
portland cement plaster is applied either by hand or machine to exterior and interior wall surfaces in two or three coats. It may be applied directly to a solid base such as masonry or concrete walls, or it can be applied to metal lath attached to frame construction, solid masonry, or concrete construction. Applied directly to concrete masonry, portland cement plaster provides a tough ½-inch thick facing that is integrally bonded to the masonry substrate. When applied to metal lath, three coats of plaster form a 7/8-inch total thickness. A vapor permeable, water-resistant building paper separates the plaster and lath from water-sensitive sheathing or framing. portland cement plaster has high impact resistance and sheds water, but breathes, allowing water vapor to escape. It’s a proven system that works in all climates.
Exterior insulation finishing systems (EIFS) consist of a polymer-based laminate that is wet applied, usually in two coats, to rigid insulation board that is fastened to the wall with adhesive, mechanical fasteners, or both. Polymer based (PB) systems, sometimes known as thin coat, soft coat, or flexible finishes, are the most common. The basecoat for polymer based systems is usually 1/16-inch thick and finish coat thickness is typically no thicker than the maximum sand particle size in the finish coat.
Exterior insulation finishing systems experienced performance problems in the 1990s, including water leakage and low impact resistance. While the polymer based skin repels water very effectively, problems arise when moisture gets behind the skin—typically via window, door, or other penetrations—and is trapped inside the wall. Trapped moisture eventually rots insulation, sheathing, and wood framing. It also corrodes metal framing and metal attachments. There have been fewer problems with EIFS used over solid bases such as concrete or masonry because these substrates are very stable and are not subject to rot or corrosion.
Clearly, portland cement plaster should not be confused with the exterior insulation and finish systems. The systems may share similarities in application techniques or final appearance, but the systems perform differently in resisting weather, especially wet conditions.
What are appropriate sheathing materials for plaster construction?
Rigid sheathing materials are commonly used behind plaster finishes. They are directly attached to support studs then covered with building paper or other weather resistant barrier (WRB). Metal lath attached over the sheathing and into the supports carries the plaster. The weather resistant barrier is intended to resist water penetration, so the sheathing is protected from moisture. That means that many materials are suitable for this application, but the common ones remain plywood, oriented strand board (OSB), cement board, and exterior grade gypsum sheathing.
In the early 1910s, basic research on stucco systems looked at the then-current practice of using board lumber (not panels) as sheathing. These were commonly 6- to 8-inch wide boards attached to support studs at 45 degree angles. During that period, diagonal placement of the boards transitioned to horizontal placement, and was followed by a move to 4-by-8-foot panels.
Wooden lath, small, narrow boards (1/4-by-1 ½ inches), were also common at that time. Although it’s not exactly clear when metal lath was first used in plaster applications, it appears that both metal and wood lath were available at least as early as 1910. Both wood and metal lath were common substrates for plaster at least through the teen years of the 1900s.
It should also be noted that it is possible to place stucco over open frame construction. This is accomplished by stretching line wires between studs and adjusting the wire to support paper as the backup to plaster. The paper is supported by the wire creating the backstop for plaster as it is applied to create the wall face. Because this is not as rigid as a board, the open frame method can allow for more variation in the thickness of the plaster. In addition it is important to understand that the open frame must be adequately rigid to resist deformation due to wind or other forces—that often means bracing the frame. The stucco layer may not be considered as part of the stiffening system.
Common sheathing materials today come in 4-by-8-foot boards. These are readily available building materials of consistent quality and are easy to install over wood or steel frames. The boards assure a more uniform thickness of the plaster layer and add structural rigidity to the building frame. For a variety of reasons, then, the currently preferred practice in many regions is to use sheathing boards for frame construction. As noted above, sheets of plywood, oriented strand board (OSB), cement board, and exterior gypsum sheathing are the most common materials for independent veneer plaster applications.
What are the correct proportions for stucco? Is there a difference between the coats?
The brown coat is applied over the scratch coat to prepare the plaster base for the finish coat application. To start with, some systems are made up of two coats and some are three. Three coat work is for systems that are constructed with lath and two coat work is for direct application to masonry or concrete backup.
Note: The brown coat is applied over the scratch coat to prepare the plaster base for the finish coat application.
The three coats consist of two base coats and one finish coat. The first base coat is called a scratch coat, the second is called a brown coat. In two coat work, there is a single base coat and a finish coat.
The purpose of the first base coat, the scratch coat, is to embed the metal lath and provide a base for the brown coat. The scratch coat gets its name from the fact that it is physically scratched with horizontal marks. These scratches create a key; for the next coat to grab onto and a shelf for moisture to aid in curing of the brown coat. The brown coat covers the first base coat and creates a plane surface, leading to the best possible results for the finish coat. The finish coat is the thinnest of the coats, and its purpose is to impart a decorative surface to the plaster.
Scratch, brown, and finish coats all have slightly different proportions. Each one has a range that is allowed, but all are specified by volume. One reason for this is to give the stucco contractor some leeway in choosing a mix that works best with the contractor’s specific materials. Another reason is that certain properties of the hardened plaster can be accentuated in each coat. The first coat will provide a hard base for the system without a great deal of shrinkage. The greater sand content in the second base coat might generate less shrinkage to create a better base for the finish than the first base coat. The finish coat should be hard to resist abrasion and other surface damage.
Proportions are clearly spelled out in ASTM C926, Standard Specification for Application of Portland Cement-Based Plaster.
- Scratch coats are mixed at 1 part cement to 2-1/4 to 4 parts sand,
- brown coats are mixed at 1 part cement to 3 to 5 parts sand,
- finish coats are 1 part cement to 1-1/2 to 3 parts sand.
It is important to note that the term “cement” includes all cementitious materials, such as cement plus lime. So if 1 part cement is used with one-half part lime, that equals 1-1/2 parts cementitious materials, and that total is then multiplied by the sand number. For the finish coat, for instance, the range is 1-1/2 to 3 parts sand: 1-1/2 times 1-1/2 is 2-1/4 and 1-1/2 times 3 is 4-1/2. So if there are 1-1/2 total parts of cementitious materials, the sand parts would range from 2-1/4 to 4-1/2.
What type of cements can be used to make stucco?
There are many types of hydraulic cements that can be used as a binder for stucco, or portland cement plaster. The cement standards used in the United States most often are from the American Society for Testing and Materials (ASTM).
A hydraulic cement is one that sets and hardens when mixed with water. Cement, along with sand and water, are the basic ingredients of a plaster mix.
The following materials are candidate binders for stucco:
- Portland Cement, ASTM C150
- Blended Cement, ASTM C595
- Hydraulic Cement, ASTM C1157
- Masonry Cement, ASTM C91
- Plastic Cement/Stucco Cement, ASTM C1328 (primarily available in the west and southwest United States)
Hydrated limes, either ASTM C206 Finishing Hydrated Lime or C207 Hydrated Lime for Masonry Purposes, are also used with portland cement to provide workability. Hydrated lime may be used with blended cement or hydraulic cement, too, but is not used with masonry cement, mortar cement, plastic, or stucco cement. Those materials already contain workability agents and the addition of lime is neither necessary nor allowed. If used with those materials, lime poses potential problems such as reduced strength or durability.
White cements are also available for use in stucco. They are generally specified under C150, C91, or C1328. Specifying white cement – sometimes white cements are blended with pigment in the factory or on the job to create colored mixes. Where white or colored plaster mixes are used, they often are applied only as the finish coat.
Standards for all of these materials are available from ASTM.
Where can I buy stucco?
You don’t really “buy” stucco so much as you buy the materials to mix stucco onsite or hire a contractor to do the work. You can purchase materials to make stucco throughout the country at material supply houses and home improvement centers.
There are a variety of acceptable mixture proportions for stucco, and the proportions of each successive coat vary. The individual materials may include portland, masonry, or plastic cement, lime or other plasticizers, sand, and water.
The following documents contain tables of mixture proportioning recommendations:
- Portland Cement Plaster/Stucco Manual, EB049
- Repair of Portland Cement/Stucco, IS526
- Standard Specification for Application of Portland Cement-Based Plaster, ASTM C926-11a
It is not impossible to handle plastering repairs as a do-it-yourself project, but it is a fairly large undertaking for the average person. You can look to your local Yellow Pages, The Blue Book of Construction, or at your local library to identify contractors in your area.
NOTE: Following statement added by staff and is not an opinion of :
The best way (in our humble opinion, of course) is to call Stucco HQ in your area and request a free quote.
Assembly FAQ
Can stucco (portland cement plaster) be applied directly over painted brick?
This is a common question that often arises when people are rehabbing or updating older construction. Plaster is a cost effective finish, relatively easily installed, that improves the appearance and creates a water resistant wall surface.
A painted surface will not typically absorb water and, as such, is a substrate to which stucco will not readily bond—at least not uniformly. There are two basic alternatives to covering a painted brick surface with a new coating of portland cement plaster.
For more detailed information about plaster, refer to Portland Cement Plaster/Stucco Manual, EB049.
Please wacth great video from professional stucco company:
Does stucco require curing, and if it does, how is this best accomplished?
For cement-based materials, curing is defined as maintaining an appropriate temperature and moisture content for a specific period of time during the early life of the material. All portland cement-based materials, such as stucco, require curing.
Since the addition of water to portland cement sets off a chemical reaction called hydration, it’s important to provide excess water to the cement particles so that they develop a good bond with their surrounding environment: aggregate and other cement particles. This is how plaster (and concrete, mortar, and grout) hardens. Plaster sections are quite thin, ranging from about 3/8- to 7/8-inch total, and individual coats may be only 1/8 inch thick. Thin layers such as this must be protected from conditions that interfere with cement hydration: things that dry them out or heat or cool them excessively.
Wet and Dry
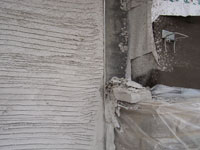
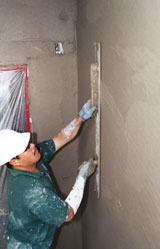
Sun and wind, alone or in combination, drive moisture out of fresh plaster. To be applied to a wall, plaster must be fluid enough to be troweled, screeded (leveled with a straight edge using a back and forth motion while moving across the surface), and floated, but not too wet that it sags or won’t stick. Base coats, of which there may be one or two (sometimes scratch and brown are combined), can be wetted once they have developed adequate strength so that they are not washed away by the water. Since the coats are thin, they can’t hold as much moisture as is ideal for curing—especially if they are competing with sun or wind, which both cause evaporation.
Plaster can be wetted periodically throughout the day to supply additional curing moisture; usually one or two times per day should suffice. In extreme conditions, sun and wind breaks can be used to provide extra protection from the elements. The first two days are the most critical period. The entire first week is important, however, so it is a common recommendation that the base coat stucco be misted or fogged periodically for the first three to seven days after placement. A sheet of polyethylene can be placed over the moistened surface to hold the water in. If the relative humidity of the air is greater than 70 percent, moist curing may be accomplished without additional wetting of the surface.
Note: Colored finishes are usually cured by wetting the brown coat to provide curing moisture from behind. In more extreme conditions, they may be covered to prevent drying.
A caution about moist curing is that colored finishes can be affected by water application. Finish coat stucco is not moist cured since this may promote mottling and discoloration. Curing of colored finishes is typically done by wetting the base coat to provide curing moisture from behind the finish and ensuring that the surface is shielded from drying.
Hot and Cold
Proper curing also requires that plaster be in a medium temperature range. Usual recommendations range from 40° Fahrenheit on the low side to 90° Fahrenheit on the high side. Too cold and there is a risk that water in fresh plaster would freeze. As this is an expansive process, cracking could occur. Cement hydration can be interrupted, too. Too hot and there is a risk of drying—which, like freezing, can also suspend cement hydration—or of accelerating the hydration process to a point where strength development in the longer term is negatively impacted.
Curing compounds are effective for concrete but are not used regularly on plaster. These materials might interfere with subsequent coats of plaster and might lead to discoloration of the stucco finish.
For more information: Portland Cement Plaster/Stucco Manual, EB049.
Does the type of joint in plaster affect its spacing or location?
Joint spacing in stucco is more of an issue over frame construction. No matter if the joint is called a control joint, a contraction joint, or an expansion joint, it is there to relieve stresses. The rules for the maximum spacing between joints and the maximum size of panel are well established and discussed in a separate FAQ on joint spacing.
Stucco is a like a thin layer of concrete. It typically contains reinforcement when it’s placed over framed construction, but may be direct-applied to solid substrates like concrete or concrete masonry. When direct applied to a solid substrate, the jointing rules are simply to follow what is present in the backup. The building itself should contain joints to limit random cracking.
Complex jointing patterns using multiple types of jointing accessories in framed construction can be confusing, because people wonder if one joint is somehow different from the others. They are different, but they have one important similarity: a joint relieves stresses and provides a separation between various sections. Again, because plaster is so thin, it must be sectioned into panels to control stresses due to volume change.
If there is a potential for out of plane movements, then the joint must be able to move in different directions, both in plane and out of plane. If a joint is a contraction or expansion joint, it simply has to move back and forth. “Expansion” joint is somewhat of a misnomer because the plaster does not increase in size beyond the as-placed volume of the individual panels.
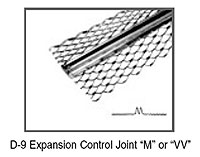
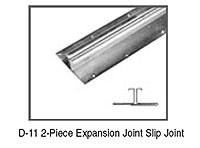
For these reasons, it is important to choose the right accessory for the joint. The one piece accessories usually have a pleat or accordion shape. They can move in plane but do not handle out of plane movements well. For those locations (control joints), such as the interface between different types of substrates, borders, penetrations (doors, windows, etc.), or at the top of a wall where it meets a roof or second story, two piece assemblies are best. These may be prefabricated or may be field-constructed by placing casing beads or other accessories back to back. Note that at a window or door frame, a casing bead adjacent to the frame serves the same purpose.
Joint accessories: one-piece and two-piece.
Jointing rules, placement and curing, and other design and construction aspects of plaster are discussed in PCA’s Plaster/Stucco Manual, EB049.
How is stucco applied over insulating concrete forms (ICFs)?
Stucco is a popular and cost-effective finish. During stucco repair or when placing plaster over insulating concrete forms (ICFs), it is recommended to treat this substrate as any other sheathed system. It should include building paper, metal lath, and three-coat portland cement plaster. In this way, plaster is properly supported, yet free to move independently of the substrate beneath it.
Some insulating concrete forms contain embedded furring strips on their face. After placing paper over the face of the ICF, metal lath is mechanically fastened to the furring strips. The lath supports plaster and holds it in position while the paper isolates the plaster from the foam. ASTM C1063, Installation of Lathing and Furring to Receive Interior and Exterior portland Cement-Based Plaster, provides guidance on the size of metal lath, number and length of fasteners, and appropriate spacing of contraction joints.
Although plaster would adhere to the face of the insulating concrete forms, the weight of the layer is more than should be supported by foam. The plaster could settle or shear entirely off the face of the wall. (Note that ASTM C926, Application of portland Cement-Based Plaster is silent on (does not currently recognize) direct application of plaster to ICFs.)
Is it necessary to use a bonding agent with stucco?
Products that increase the adhesion of plaster to substrate or plaster to plaster are called bonding agents, and are either surface applied to a substrate or integrally mixed into the plaster.
A distinction should be made between framed construction and solid backing (such as masonry or concrete). Framed construction requires the installation of moisture-resistant paper behind the lath. There is no need to have plaster bond to the paper, so bonding agents are not used with framed construction, only solid surface substrates.
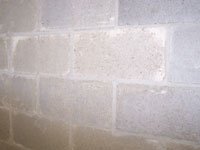
If contamination is present on the substrate surface, good bond is inhibited. This is generally not a concern with new masonry walls, but can be an issue with new cast-in-place concrete as it may have residual form release agent on its surface. Older concrete or masonry walls may have bond-inhibiting characteristics, in the form of paint, sealer, some other coating, or dirt on the surface. As such, bonding agents are more likely to be considered for repair and renovation work over either concrete or concrete masonry.
It is generally good practice to prepare the solid substrate so a bonding agent is not necessary. The prepared surface should be clean (all surface materials removed), sound (hard surface), and mechanically roughened. Methods for achieving these criteria include sand blasting and high-pressure water blasting. If this type of preparation does not result in a clean, sound, and roughened substrate, bonding agents offer another solution.
Bonding agents have different chemical formulations, so they have different performance characteristics. Bonding agents do not guarantee performance. Research the material to find out which is best suited to particular conditions. Where prepared surfaces seem questionable, and lathing is not an option, a bonding agent may be beneficial.
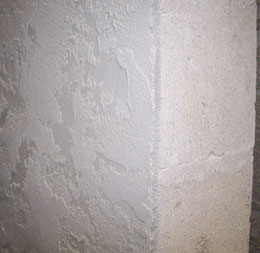
Plaster finish on a concrete masonry wall.
Surface-applied bonding agents should conform to the requirements of ASTM C932. Integral bonding agents should be used only after review of the manufacturer’s documentation of testing and past performance.
Products that increase the adhesion of plaster to substrate or plaster to plaster are called bonding agents, and are either surface applied to a substrate or integrally mixed into the plaster.
A distinction should be made between framed construction and solid backing (such as masonry or concrete). Framed construction requires the installation of moisture-resistant paper behind the lath. There is no need to have plaster bond to the paper, so bonding agents are not used with framed construction, only solid surface substrates.
Dash Bond Coat
Rather than using bonding agents, another option for low-absorption surfaces is to apply a dash bond coat. This cement rich slurry is dashed against the base surface by hand with a brush, trowel or paddle, or by machine. Most of the surface is covered with the plaster. The high cement content provides a tenacious bond. This material is left unfinished so that a rough base is created for the scratch coat.
Rather than using bonding agents, another option for low-absorption surfaces is to apply a dash bond coat. This cement rich slurry is dashed against the base surface by hand with a brush, trowel or paddle, or by machine. Most of the surface is covered with the plaster. The high cement content provides a tenacious bond. This material is left unfinished so that a rough base is created for the scratch coat.
Plaster is placed in two or three layers, or “coats.” Are there guidelines or restrictions on placing each successive coat?
Industry documents contain guidelines for placing each coat of stucco in two coat or three coat systems during stucco repair or installation. The recommendations are there to ensure 1) proper curing and 2) strength development of the previously installed coats.
To cure cement-based materials means to allow them the opportunity to hydrate, and this requires both adequate moisture and proper temperature. The International Building Code (IBC) provides rules for the minimum time delay between each coat of plaster (see table). Exterior plaster has more stringent requirements because it is typically subject to more severe exposure than interior plaster.
Time Delay Between Each Coat of Exterior Cement Plaster Based on IBC Requirements
There are two related, but distinct, reasons for delaying application of a subsequent layer of plaster on top of a previously installed layer. One reason is that there has to be adequate moisture retained in each layer. Usually, this is accomplished by misting the plaster once or twice during the day. It can, however, be adequately accomplished by preventing evaporation of moisture from the plaster—and placing the next layer of plaster on top of the other does that. But it’s only allowed if the underlying layer has gained adequate strength. That is the second reason for a time delay between coats: making sure the plaster isn’t damaged by application of another layer.
This exception to the rule—referred to as a double-up or double-back procedure—allows for more efficient labor practices. The wording indicates that a second coat of plaster (brown coat) can be applied to the first base coat (scratch coat) as soon as the first coat has attained sufficient rigidity to receive the application without damage. This often occurs on the same day (see the footnote to the table above). Curing of the second coat then proceeds per the table.
Following guidelines for curing and delay between coats usually result in the most consistent surface finish—uniform texture and color.
What is the correct thickness of stucco?
Stucco thickness depends on the backup system and on whether or not lath is present. In ASTM C926, the Standard Specification for Application of Portland Cement-Based Plaster, thicknesses are provided for scratch, brown, and finish coats.
Over frame construction, lath must be used. Over solid substrates—which include concrete masonry, cast-in-place concrete, and precast concrete—lath is sometimes used. When lath is present, three-coat plaster is recommended. Note that frame construction—metal or wood studs—may or may not have sheathing present, but that plaster thickness is independent of sheathing. With lath, total plaster thickness is 7/8 inch.
Three-coat work can also be specified for solid plaster bases without metal lath. The correct thickness is then 5/8 inch.
Two-coat applications are only for use over solid plaster bases without metal lath. For unit masonry, that thickness is ½ inch. For cast-in-place or precast concrete, the thickness for two-coat work is 3/8 inch. These are direct-applied systems, meaning that there is no metal lath involved.
It is important to note that the committee in charge of ASTM C 926, the reference document for this application, has decided to keep the term “nominal thickness” in the title of the table for two- and three-coat work. This term takes into account that walls are built to certain tolerances and may not be exactly plumb or plane. The reference to a nominal thickness allows for small variations from an exact dimension. The intent of the specified thickness is to provide a reasonable system that, over many years, has proven itself to be weather resistant and durable. Local building officials should be consulted for further information about variations from the specified thickness.
See www.astm.org for information about ordering a copy of ASTM C926, which contains the recommendations for both vertical and horizontal plaster thickness over metal plaster bases and solid plaster bases.
What is the installed weight of portland cement plaster?
This question comes up in both new and repair construction. Designers need to know how much weight the stucco adds to the wall so that they can be sure the structural system provides adequate support.
In new construction, the structural system usually has more than enough strength to support installed plaster. In buildings that are being updated or retrofitted, however, stucco may be placed over existing construction. Especially in this case, designers should verify that the added weight of the new stucco will not exceed the structure’s ability to support it along with whatever other materials remain in place.
Concrete or masonry walls generally have sufficient structural strength to support the additional weight. In wood frame construction, support members (studs) should be checked to ensure they can carry the extra load.
On wood framing, three coat plaster is typically installed over metal lath to a 7/8 inch nominal thickness. A typical plaster mixture weighs about 142 pounds per cubic foot, roughly the same as mortar, and this amount of material would cover about 13.7 square feet at 7/8 inch thick. The metal lath may add a small additional amount of weight, so the end result is that three coat stucco weighs about 10.4 pounds per square foot (psf) installed.
For more information about the unit weight of plaster or installed weight, see Tables 1a and 1b on p.6 of PCA’s Portland Cement Plaster/Stucco Manual, EB049.
What is the proper spacing for contraction/expansion joints in portland cement plaster/stucco applications?
The proper use of contraction joints in stucco systems will depend on a number of variables, including: the type of construction materials to which the stucco will be applied; the orientation of the construction—vertical (walls) or horizontal (ceilings), and whether the surface is curved or angular.
Stucco may be direct applied to concrete or masonry substrates; however, if these materials are used together, as in the case of a concrete framework of beams and columns with masonry block infill, a joint may be required at the transition of one material to another. Stucco that is direct applied to concrete or masonry requires contraction joints only where there is a change in material or where there are joints in the concrete or masonry structure.
Metal lath may be used over concrete or masonry construction and should be used in sheathed frame and open frame construction. When stucco is applied to any construction using metal lath, joint spacing recommendations should be implemented. The recommendations found in the Portland Cement Plaster/Stucco Manual, EB049, are based on ASTM C1063, Standard Specification for the Installation of Lathing and Furring to Receive Interior and Exterior Portland-Cement Based Plaster. Applications that use metal lath require three layers of plaster: scratch, brown, and finish coats.
The joint spacing should meet the following criteria:
- No length should be greater than 18 feet in either direction.
- No panel should exceed 144 square feet for vertical applications.
- No panel should exceed 100 square feet for horizontal, curved, or angular sections.
- No length-to-width ratio should exceed 2 ½ to 1 in any given panel.
Why use building paper?
Currently, per the building code, a portland cement plaster is only required to have a weather resistant barrier (WRB) behind it, which is satisfied by the ICF; hence, building paper would not necessarily be required. However, in an insulating concrete forms-stucco installation, the paper’s primary function is to serve as a bond breaker and not as a weather resistant barrier between stucco and insulation, which have significantly different rates of expansion and contraction due to changes in temperature and moisture condition.
Therefore, best practice indicates isolating the two materials from each other to allow independent movement and reduce stresses that might otherwise lead to cracking in the plaster layer. By using a permeable paper, the permeability of the wall system remains unchanged.
If it is desired to apply a finish directly to the foam form, an exterior insulation and finish system (EIFS) material may be considered. These finishes are thin, lightweight, and tough. Although the thinner exterior insulation and finish system materials can be direct-applied, moisture management then becomes even more critical. If an EIFS coating is chosen, openings (windows, doors, etc.) must be properly detailed and constructed so that moisture is kept out of the wall because the system is not breathable. The EIFS Industry Members Association (EIMA) may provide additional information on finishing and details.
Stucco is known to be a weather resistant building finish, but it is part of a system. In order for the wall to resist water penetration effectively, the system must be properly designed and detailed, then built according to plans.
The main purpose of building paper is to keep water from contacting the substrate and structural support members—very commonly sheathing like plywood or oriented strand board (OSB and wood or metal studs—so that these materials stay dry. Metal can rust and wood can rot. Also, wood is prone to expand and contract with changes in moisture, so it’s essential to keep sheathing dry to provide the plaster with a sound substrate. Minimizing the changes in moisture minimizes the stresses that might be placed on plaster from behind. In addition to structural considerations, excess moisture within a wall creates a potential for mold or mildew inside buildings.
Building paper prevents moisture-related problems in stucco walls. Several industry documents, such as PCA’s Portland Cement Plaster/Stucco Manual, EB049, ACI’s Guide to Portland Cement-Based Plaster, and building codes across the country, recommend two layers of paper.
During construction, paper can be damaged. Two layers of paper provide greater assurance that water won’t get to the sheathing or support members. Paper should be lapped like siding, meaning that upper layers are placed over lower layers. This facilitates drainage toward the outside. Where the edges of paper-backed lath meet, connections should be lath-to-lath and paper-to-paper.
Building paper should comply with the current requirements of UU-B-790a, Federal Specifications for Building Paper, Vegetable Fiber (Kraft, Waterproofed, Water Repellent, and Fire Resistant). This specification differentiates weather resistive Kraft papers by types, grades, and styles. Grade D is a water-vapor permeable paper. Grade D paper with a water resistance of 60 minutes (or more) works well for stucco applications, and is often preferred to Grade D paper having the minimum 10-minute resistance required by UU-B-790a.
Some specifiers are turning to house wraps for stucco underlayment. While these materials may be more rugged than paper—and therefore less prone to damage during installation—a single layer is still not adequate according to many industry professionals. At best, a hybrid system, with the house wrap closest to the sheathing and covered with the paper, seems to be an acceptable alternative.
Performance FAQs
How long does stucco last on a building?
While the service life of stucco can’t be quantified as a specific number of years, properly applied and maintained portland cement plaster, or stucco, is as durable as any commonly used cladding material. Its hard surface resists abrasion and can take a lot of physical abuse. It stands up to all sorts of climates, from cold to hot and wet to dry. Many homes built in the early 1900s have had very little maintenance and remain in good shape today.
Now that we are seeing cold weather, are there any restrictions on plastering at lower temperatures? Can installation in too low a temperature be problematic for any aspect of stucco work, say, getting a durable finish?
For best performance, the temperature of newly applied stucco should be maintained at a minimum of 40 degrees Fahrenheit. In many cases, this can be achieved by heating the structure and covering the exterior surfaces. As temperatures drop lower, plaster ingredients can be heated before mixing the stucco. Both water and sand have enough mass to hold heat well, though it is often easiest to heat water. However, either one, or both, materials can be heated to give plaster added protection in cold weather. To prevent problems like flash set of plaster, fresh mixtures should not be heated to temperatures exceeding 120 degrees Fahrenheit.
Most importantly, the stucco should not be allowed to freeze during the first 48 hours after placement. Excess water in the fresh stucco mixture expands as it freezes, thereby compromising the strength and durability of the finished product.
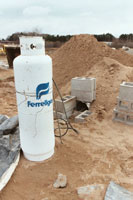
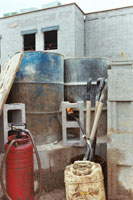
Note: Sand can be heated over fire in a pipe, and water can be heated in metal drums.
For a more complete discussion of this and other aspects of stucco construction, see PCA’s Portland Cement Plaster/Stucco Manual, EB049.
What kind of fire rating does plaster provide?
Portland cement-based plaster, commonly called stucco, has long been and continues to be a popular choice for finishes on buildings. It allows for a wide expression of aesthetics, is a cost effective finish, is durable in all types of climates (especially wet ones), and offers fire resistance. Fire resistance is typically classified by a fire rating, but what kind of fire rating does plaster provide?
Things that influence the fire rating of a plaster system include the type of material used for the support member, size of the support member, presence/absence and type of exterior sheathing, aggregate in the plaster mix, presence/absence of insulation, presence/absence of interior wall finishing materials (gypsum wallboard, etc.) and thickness of the section. The type of member—wall, partition, ceiling, or other, and member classification (load bearing(LB) or non-load bearing (NLB)) also influences the rating.
In 1991, the Foundation of the Wall and Ceiling Industry published a reference guide on portland cement-based plaster/stucco systems used for fire protection, the Single Source Document on Fire-Rated Portland Cement-Based Plaster Assemblies. Designers, specifiers, building code officials, contractors, and general public are the intended audience. The information contained therein is “not intended as design or installation criteria,” but can help people determine how to assess their assemblies using the referenced publications, fire test reports, industry standards, and codes.
For example, a typical residential application might be a three-coat system of plaster over 2-by-4-inch wood studs using metal lath attached to the studs, either with or without a layer of sheathing, like plywood. On the interior side would be a layer of gypsum board. The detail for a system made with these components is assigned a one-hour fire rating based on 1988 Uniform Building Code information.
Contact information
Association of the Wall and Ceiling Industry
The Foundation of the Wall and Ceiling Industry is affiliated with the Association of the Wall and and Ceiling Industry. Its mission is to be an active, unbiased source of information and education to support the wall and ceiling industry. The association is is located at 513 W. Broad St, Suite 210 in Falls Church, Virginia, 22046.
Aesthetics FAQ
Can I paint stucco to get the color I want?
Stucco can be painted. Portland cement-based paints are very compatible with stucco because they are made of the same material. These paints should be scrubbed into the surface and fully cured. Alternatively, you could consider a colored stucco finish. These finish coats are often made with white cement and pigments, providing the widest range of colors. Premixed materials are color matched from batch to batch and are most consistent.
Additionally, the fact that you are placing a finish coat with a nominal thickness of 1/8 inch instead of a paint layer usually gives more assurance of complete coverage. It is possible to paint with other types of paint, though these are usually not as long lasting as cement-based paint. Acrylic paints are long lasting and durable but change the permeability of the stucco (make it non-breathable) which in some climates may have adverse effects on the long-term performance of the system.
What is a fog coat?
A fog coat is a light application of a cement-based slurry, the same proportions of cement, lime (if any), and water as used in the original application minus the sand, used to even out a surface’s appearance. It is typically sprayed or rolled onto the surface, similar to painting with a cement-based paint. Fog coating improves the look of stucco without changing its ability to transmit moisture vapor.
How do you create ornamental shapes on plaster surfaces?
Stucco finishes are popular across North America. They lend themselves to nearly every type of architectural style. Certain styles can be enhanced with built-out shapes, such as cornices, quoins, or decorative tiles. Achieving these details on plaster finishes has evolved over time to today’s simple techniques.
Creating Shapes
Shapes are sometimes referred to as “plant-ons” because that’s how they are attached to stucco surfaces. An expanded polystyrene foam section is bonded to the basecoat with a material made specifically for that purpose. Some people use an EIFS basecoat material as the glue. This is attached to a portland cement plaster base, typically the brown and scratch coats, before final finishing. The shape is then finished like EIFS: covered with a basecoat and mesh, then a finish coat.
What to Consider
The shapes must be securely attached to the wall. The basecoat material acts like a glue to hold the backside, then also embeds the mesh that goes over the top of the shape. As the foam itself has no structural strength, the mesh and basecoat together provide an impact-resistant surface to the shape, protecting it in service.
Resources
The Stucco Resource Guide from the Northwest Wall and Ceiling Bureau is one source of design and installation information for ornamental plaster shapes. It provides sample details of walls sections for creating architectural details on stucco walls.
Can stucco, portland cement plaster, be cleaned, and if so, what methods should be used?
Whether you have some type of atmospheric contamination, biological growth, or staining from another construction process, stucco can be cleaned effectively. Because it is important to choose an appropriate cleaning method based on what actually created the stain, there is no single best process for cleaning stucco surfaces. To clean a dirt-contaminated surface, the following advice is useful.
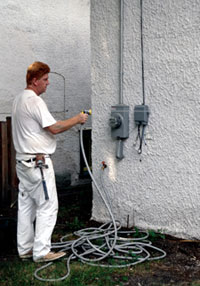
Whenever using water on a cement-based material like stucco, the substrate should have set and hardened. Water under pressure can etch the surface and at higher pressures can even cut through hardened stucco. To prevent this, the water spray should be moved over the surface uniformly.
Most dirt is removed fairly easily. Cleaning power is increased by doing one or more of the following: increasing water temperature, scrubbing with a brush, or using some type of chemical detergent.
To clean stains other than simple soiled surfaces refer to the reference documents for additional recommendations. You always should test the method on an inconspicuous area to first demonstrate its effectiveness and to assure that it won’t damage the plaster.
What are common stucco finish textures? Is there anywhere to view them?
The Technical Service Information Bureau (TSIB) is a trade group in southern California serving the needs of the wall and ceiling industry regarding lath, plaster, and drywall. They have an excellent online resource depicting plaster textures.
The 30 textures shown on the site are accompanied by suggested application procedures. This gives material (ingredient) advice, where appropriate, and methods of applying or finishing the plaster to achieve specific appearances. For instance, the sand float finishes are described as light, medium, or heavy, and the grain size of aggregate helps achieve the desired texture. All of the textures can be made with gray or white cement, with or without pigments.
It is important to be aware of regional differences in naming finishes. Certain parts of the country may call a specific texture by another name than described by the TSIB. That is why this site is so beneficial: it provides visual depictions of each finish to prevent misinterpretations that might occur with verbal descriptions.
RESOURCE CREDIT:
Stucco Frequently Asked Questions was republished from www.Cement.org. Original resource can be read in its entirety HERE.
Videos were chosen and added by StuccoHQ.com editor and in no way are associated with or endorsed by www.cement.com.

